 how-to
Rural Construction Waste Disposal: A Practical Guide
Table of Contents
- Why Rural Construction Waste Disposal Needs Its Own Plan
- Start With a Pre-Project Site Assessment and Waste Forecast
- Construction Waste Reduction Best Practices for Remote Sites
- On-Site Segregation, Storage, and Wildlife Controls
- Construction and Demolition Waste Recycling: What Actually Works
- Construction Site Waste Management Checklist for Rural Builds
- Construction Waste Management Plan Example: A Rural Template
- Managing Hazardous Materials and Regulatory Compliance
- Frequently Asked Questions
Last Updated: October 13, 2026
Why Rural Construction Waste Disposal Needs Its Own Plan
Managing rural construction waste disposal is a different job than it is in town.
A rural waste plan is a written set of rules for what leaves your site, where it goes, and who hauls it, sorting, storage, hauling, and disposal, decided before the first excavator shows up.
At Timeless General Contracting, we build and renovate in Pictou County, so we plan waste before we plan the foundation.
Distance, Cost, and Limited Facilities
Hauling is the biggest cost driver on a rural job. A short drive to a transfer station is cheap. A long haul on a gravel road is not.
Fewer facilities also means fewer choices, many rural areas have one landfill, one recycling depot, and no commercial composting nearby.
So plan around these limits:
- Confirm the nearest landfill, transfer station, and recycling depot
- Measure the round-trip drive for each
- Ask about tipping fees and load limits before you haul
What Changes When You're Off the Grid
No sewer, no grid power, and no paved access road change the waste math.
Wildlife is a real factor too. Food waste and green waste attract animals on remote sites. That means covered bins, not open piles.
Then there's access: a soft shoulder or low bridge can block a full bin truck, so check routes before you commit to a hauler.
Start With a Pre-Project Site Assessment and Waste Forecast
A pre-project site assessment is a walk-through and desktop review that estimates what waste a build will produce and how you'll handle it. Doing it early is the best way to avoid surprise disposal costs.
Most guides skip this step. You can't sort or haul what you never planned for.
Estimating Waste Quantities Before You Break Ground
You don't need exact numbers. You need rough volumes by material type so you can size bins and book hauling.
A simple method:
- List each major phase (demolition, framing, concrete, finishing)
- Note the waste each phase creates
- Estimate rough volume per material (wood, concrete, metal, soil, general)
- Add a buffer for surprises
For a renovation, demolition usually produces the most material. For a new build, framing and concrete dominate.
Verifying Local Facilities and Regulations
Rules vary by province, municipality, and even by site, so confirm what applies before you haul anything.
Check these items:
- What your local government requires in a waste plan
- Which materials the local landfill bans or limits
- Permit conditions tied to waste handling
Provincial environment departments publish guidance on waste handling and diversion. Verify current requirements with the provincial environment ministry guidance that governs your area, and confirm local bylaws with your municipality.
Construction Waste Reduction Best Practices for Remote Sites
The cheapest waste is the waste you never create. Source reduction beats recycling on a rural job because you skip the haul entirely.
Here's what actually works on remote builds.
Source Reduction and Smart Ordering
Order to fit the build, not the truck discount. Bulk savings vanish if half the material ends up in a bin.
Practical moves:
- Order materials in dimensions that match your design
- Use takeoff software or a careful manual count
- Ask suppliers about returns for unused, unopened stock
A common mistake is over-ordering "just in case." On a rural site, that surplus becomes waste you pay to haul.
Design Choices That Cut Waste
Design decisions lock in waste before a single board is cut. Standard dimensions and simple layouts cut scrap.
Try these:
- Align room sizes to standard sheet and lumber dimensions
- Use modular or panelized systems where they fit
- Specify materials with take-back or recycling options
If your custom design has lots of odd angles, expect more offcuts, plan a use for them.
On-Site Segregation, Storage, and Wildlife Controls
Source separation, sorting waste into streams where it's created, is the backbone of any construction waste management plan, and it's harder on a rural site.
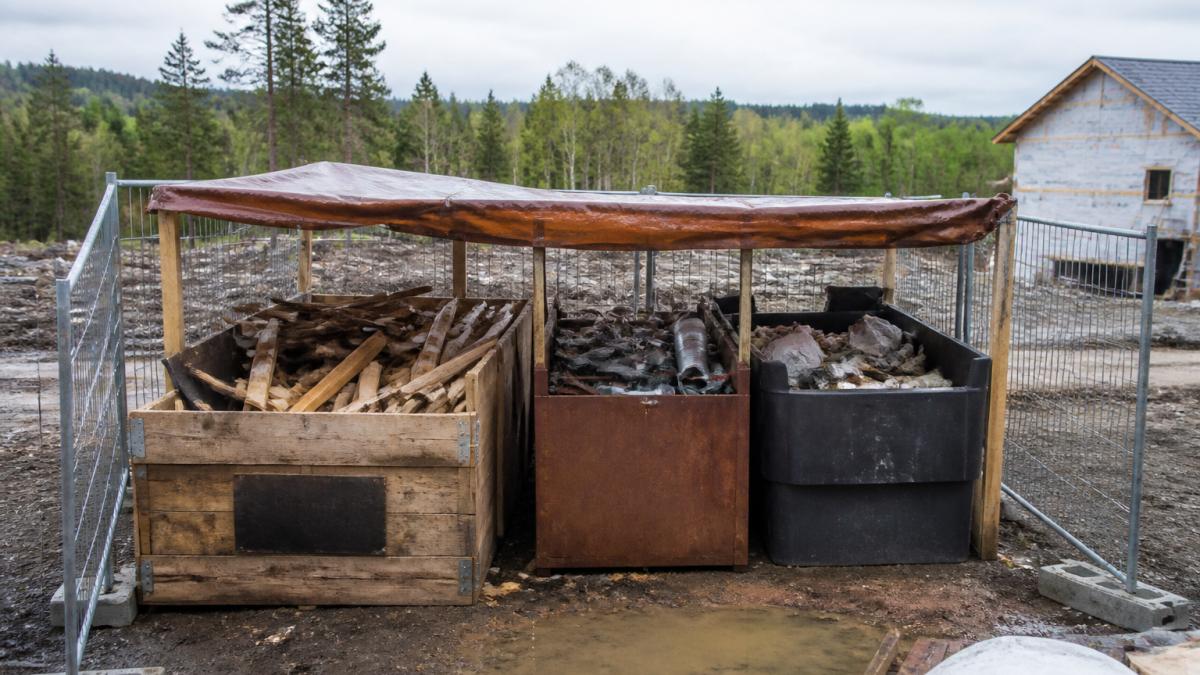
Set up a designated disposal area away from the building and water.
A simple setup:
- One bin for wood waste
- One for metal
- One for concrete and rubble
Contamination kills recycling value. One greasy pizza box in a clean wood bin can send the whole load to landfill.
Construction and Demolition Waste Recycling: What Actually Works
Construction and demolition waste recycling works best when you sort at the source and keep streams clean. Mixed loads get downcycled or landfilled. Sorted loads get recovered.
Diversion rates climb when you plan the streams before demolition starts, and fall when you sort a mixed pile after the fact.
Wood, Concrete, and Metal Recovery
Wood waste is the easiest win. Clean dimensional lumber can be reused.
Concrete and rubble can be crushed into aggregate for road base or fill. Metal almost always has scrap value, and it's the simplest stream to keep clean.
| Material | Best Option | Watch For |
|---|---|---|
| Clean lumber | Reuse or salvage | Nails, treated wood |
| Wood offcuts | Chipping or biomass | Paint, preservatives |
| Concrete | Crushing for aggregate | Rebar, contamination |
| Metal | Scrap recycling | Mixed metals, coatings |
| Soil | Reuse on site | Contamination, erosion |
Keep treated wood out of clean wood streams. It belongs in general waste or a dedicated stream, depending on local rules.
Soil, Dirt, and Aggregate Reuse
Soil is heavy, and hauling it is expensive. Reuse it on site wherever you can.
Stockpile topsoil separately for later landscaping and use clean fill for grading and berms. If you must haul soil off site, confirm the receiving facility accepts it and check for contamination first.
Stockpiles need erosion control. Cover them, and keep them out of drainage paths.
Construction Site Waste Management Checklist for Rural Builds
A construction site waste management checklist keeps the plan on track from day one to final clean-up. Print it, post it, and assign an owner for each item.
- Complete a pre-project waste forecast
- Confirm local rules and permit conditions
- Verify the nearest landfill, depot, and hauler
Review the checklist weekly, small gaps become big costs.
Construction Waste Management Plan Example: A Rural Template
A construction waste management plan example gives you a starting point to adapt to your site. Here's a rural template to copy and fill in.
Section 1: Project Overview and Waste Forecast
State the project, the site, and the expected waste by material.
- Project name and location
- Build type (new build or renovation)
- Expected waste by material and rough volume
Section 2: Segregation, Storage, and Hauling Procedures
Describe how waste moves from site to final destination.
- Bin types and locations
- Sorting rules for the crew
- Storage and weather protection
Keep the plan on site. Update it when conditions change.
Managing Hazardous Materials and Regulatory Compliance
Hazardous and regulated materials need their own plan, separate from the general waste stream. Asbestos, lead-containing paint and dust, solvents, fuels, adhesives, and some sealants cannot go in a general bin, and mixing them contaminates otherwise recoverable loads.
On a rural site this matters more, not less: fewer licensed receivers, longer haul distances for regulated loads, and less margin for a rejected load at the gate.
Identifying Regulated Materials Before You Disturb Them
You cannot manage what you have not identified. Build a short identification step into the pre-demolition phase:
- Asbestos. In buildings constructed before the mid-1980s, assume asbestos may be present in insulation, floor tile and mastic, ceiling texture, drywall joint compound, duct wrap, and some siding and roofing. A qualified consultant collects samples and a laboratory confirms the result before any disturbance.
- Lead. Lead-based paint is common in older housing stock. Paint in good condition can often be left in place; paint that will be sanded, ground, or demolished needs testing and controls.
- Fuels, oils, and solvents. Store these in labelled, closed containers on an impermeable surface with secondary containment. Keep a spill kit within reach.
A simple rule: if you are unsure, isolate it, label it, and get it tested. A lab test costs far less than a contaminated load or a stop-work order.
Isolation, Storage, and Documentation
Once identified as regulated, a material moves through a controlled chain:
- Isolate it from general waste in a designated, signed area.
- Contain it in sealed, labelled packaging, double-bagged or wrapped where the material is friable.
- Store it under cover, away from drainage paths, traffic, and ignition sources.
- Document every step: what it is, where it came from, who handled it, and where it went.
Keep a running hazardous waste log on site: for each removal, record the date, material, quantity, abatement or handling contractor, and receiving facility. Photograph the material before removal, during containment, and at pickup. This record protects you if a regulator, future buyer, or insurer asks questions later.
Licensed Disposal and the Paper Trail
Regulated waste must go to a facility licensed to receive it. Confirm in advance that the facility accepts the specific material and the hauler is permitted to transport it.
Keep copies of every manifest, receipt, and certificate of disposal. A complete paper trail is the difference between a clean closeout and a liability that follows the project for years.
Compliance Beyond Waste
Regulatory compliance on a rural site covers more than the bin. Depending on your project, you may also need to address:
- Air quality, dust suppression during demolition and crushing, and restrictions on open burning.
- Water protection, sediment and erosion controls around stockpiles, and no discharge to ditches, wetlands, or watercourses.
- Storage of fuels and chemicals, secondary containment and distance from wells and surface water.
Verify current requirements with the provincial environment ministry guidance that governs your area, and confirm local bylaws with your municipality. Requirements vary by province and municipality, and they change.
For complex builds, a Red Seal certified contractor can keep the waste plan and build schedule aligned. That's the oversight we bring at Timeless General Contracting, and our innovative Client Project Portal ensures you stay informed by tracking your build in real-time, providing a seamless and professional construction experience from start to finish.
Frequently Asked Questions
What are the 5 ways to manage construction waste properly?
The five core methods are source reduction (ordering only what you need), on-site segregation (separating materials at the point of generation), reuse and salvage (keeping usable materials out of the bin), recycling (wood, concrete, metal, and cardboard), and responsible landfill disposal for what remains. On rural sites, add a sixth step: plan hauling routes and storage before demolition begins, because distances to facilities make every unnecessary bin trip expensive.
What should a construction waste management plan include?
A solid plan covers six things: a waste forecast by material type, designated on-site storage and segregation areas, a list of local recycling and disposal facilities with distances, hauling logistics and frequency, handling procedures for hazardous materials, and a tracking method for diversion rates. For rural builds, add weather and wildlife protection for stored materials and a contingency for road closures or seasonal access limits.
How can rural construction waste be recycled or reused?
Wood waste can be chipped for landscaping or agricultural use. Clean concrete and rubble can be crushed for aggregate recovery in driveways or foundations. Metal offcuts go to scrap dealers. Soil and dirt can be reused for grading or berms on the same site. Salvaged fixtures, doors, and timber can be stored for future projects. Check with your local municipality or regional waste authority for facility hours and accepted materials before you plan hauling.
How do you arrange construction waste removal when disposal facilities are far away?
Start by mapping the nearest recycling and disposal facilities and their accepted materials. Then consolidate loads: use large roll-off bins instead of multiple small trips, and schedule pickups to coincide with material delivery runs. For remote sites, consider on-site crushing or chipping to reduce volume. Confirm seasonal road weight limits and access restrictions with your hauler. A single well-planned hauling schedule cuts both cost and site disruption.