 how-to
Airtight Construction on a Budget: Essential Steps
Table of Contents
- Why Airtightness Matters for Energy Efficiency and Comfort
- Planning Your Air-Sealing Strategy Before Construction Starts
- Choosing Cost-Effective Air Barrier Materials
- Prioritizing Air Sealing by Budget: Where to Focus First
- Air Sealing New Construction: Practical Techniques and Materials
- How to Find Air Leaks in a Home During Construction
- Blower Door Test: Measuring Airtightness and Setting Targets
- Ventilation and Moisture Management: Avoiding Common Pitfalls
- Frequently Asked Questions
Last Updated: October 11, 2026
Why Airtightness Matters for Energy Efficiency and Comfort
Airtightness is the measure of how well a building envelope resists unwanted air movement between inside and outside, and managing it within an airtight construction budget is essential for energy efficiency. When a home is airtight, heated or cooled air stays where you want it.
This translates directly to lower heating and cooling costs. A poorly sealed home loses energy constantly. You pay to heat air that leaks out. In cold climates, drafts create uncomfortable cold spots near walls and windows.
Beyond cost, airtightness improves comfort. No drafts means consistent temperatures throughout your home. Indoor air quality improves when you control where air enters and exits. Moisture problems decrease because uncontrolled air movement carries humidity into wall cavities where it causes rot and mold.
The key is understanding where to focus your effort and materials for maximum return.
Planning Your Air-Sealing Strategy Before Construction Starts
The best time to plan air sealing is before construction begins. You can't retrofit an air barrier as easily as you can build it in from the start.
Begin by identifying your air barrier location. This is the continuous boundary that stops air movement.
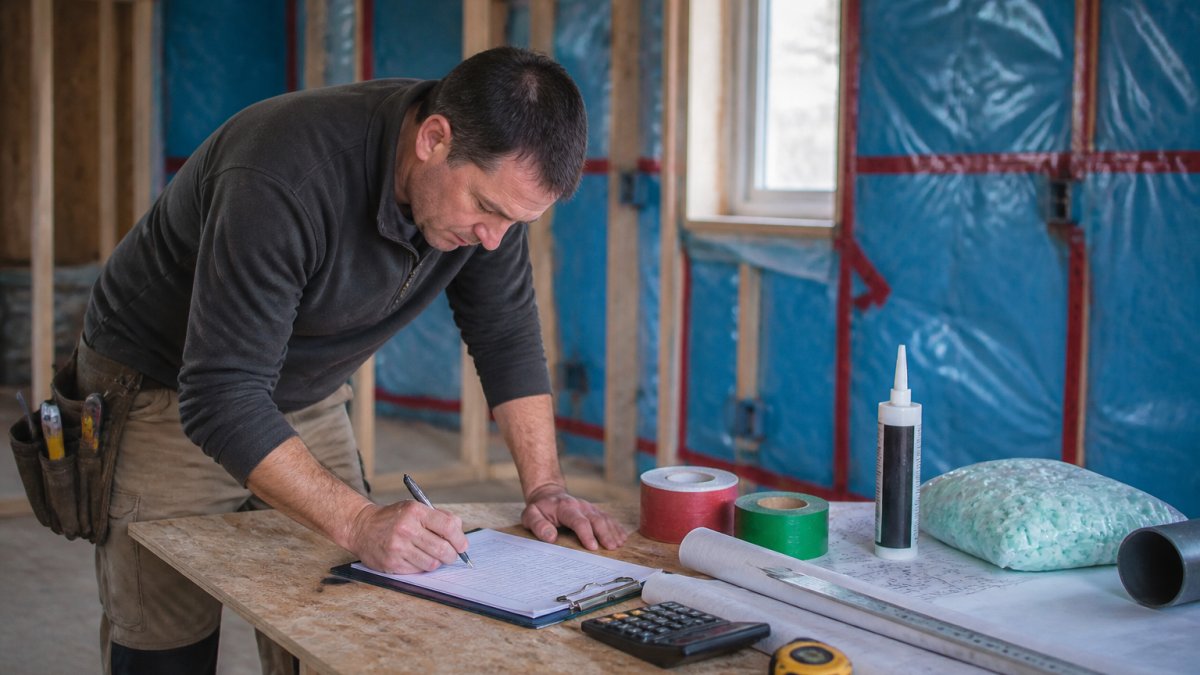
Create a simple air-sealing plan. Mark on your drawings where the air barrier line runs. Identify every penetration: electrical outlets, light fixtures, HVAC ducts, plumbing, exhaust fans. Each one breaks the barrier and needs sealing.
Prioritize by budget. You can't seal everything at once. Decide whether you'll focus on foundation first, then walls, then roof. Or tackle the most critical penetrations across all levels. This phased approach keeps costs manageable.
Communicate the plan to your entire team. Carpenters, electricians, and plumbers all affect airtightness. If they don't understand the air barrier concept, they'll drill holes and run pipes without sealing them.
Choosing Cost-Effective Air Barrier Materials
The air barrier material depends on your construction method and budget. Several options deliver results at different price points.
Airtight drywall is one of the cheapest approaches. Use standard drywall as your air barrier.
Air-sealing tape comes next. Specialized tapes designed for air barriers stick to wood, metal, and other surfaces.
Spray foam provides excellent sealing around irregular shapes and penetrations. Open-cell foam is cheaper than closed-cell. Closed-cell offers better moisture resistance.
Liquid-applied membranes or brush-applied membranes create a continuous seal over large areas. They're ideal for exterior sheathing or interior drywall.
Caulk remains the workhorse for joints and seams. Acrylic latex caulk is budget-friendly. Polyurethane caulk costs more but lasts longer and handles movement better.
For an airtight construction budget, combine materials strategically. Use caulk for visible seams. Use tape on hidden framing joints. Reserve spray foam for complex penetrations.
Prioritizing Air Sealing by Budget: Where to Focus First
Not all air leaks are equal. Some locations leak far more than others. Prioritize these high-impact areas first.
Phase 1: Foundation and Critical Penetrations
Start at the foundation. Air leaks here directly affect living spaces above. Seal the rim joist, the band of framing where the foundation meets the wall. Caulk or spray foam all gaps between the concrete and wood.
Seal penetrations where utilities enter: water lines, sewer, electrical conduits, gas lines. These holes are often large and poorly sealed. Use spray foam or caulk to close them completely.
Seal the band joist rim thoroughly. This single area can account for 10-15% of total air leakage in a poorly sealed home. The effort here pays off immediately in reduced drafts and lower heating costs.
Expected time: 4-6 hours for a typical foundation perimeter
Materials needed: Caulk or spray foam, caulking gun, utility knife
Phase 2: Windows, Doors, and Service Openings
Windows and doors are next. These are visible, so proper sealing matters for appearance too.
Install windows with a continuous bead of caulk around the exterior perimeter. Use sealant rated for exterior use. Caulk the interior perimeter as well. Don't rely on the window frame alone, it has gaps.
Seal around door frames the same way. Pay special attention to the threshold. Water and air both find their way under poorly sealed doors.
Seal service openings: dryer vents, exhaust fans, range hoods, outdoor electrical outlets. Each one is an air leak point. Install proper duct sealing or foam gaskets behind outlet boxes.
Expected time: 2-3 hours per window or door
Materials needed: Exterior caulk, interior caulk, weather stripping
Phase 3: Roof Sealing and Upper-Story Details
Seal the top of the thermal envelope last. Roof penetrations, vents, skylights, chimneys, leak warm air in winter.
Caulk or tape all seams in roof sheathing before installing roofing material. Seal around roof penetrations with flashing and caulk. Use spray foam for irregular gaps.
Seal the attic access hatch with weather stripping and caulk. This single opening can leak as much air as several windows.
Seal electrical and HVAC penetrations through the ceiling. Every hole is an air leak path into the attic.
Expected time: 6-8 hours for a typical roof
Materials needed: Roofing caulk, tape, spray foam, flashing
| Phase | Priority Areas | Time per Area | Best Materials |
|---|---|---|---|
| Phase 1 | Rim joist, utility penetrations | 4-6 hours total | Caulk, spray foam |
| Phase 2 | Windows, doors, service vents | 2-3 hours each | Caulk, weather stripping |
| Phase 3 | Roof penetrations, attic access | 6-8 hours total | Roofing caulk, tape, foam |
Air Sealing New Construction: Practical Techniques and Materials
Proper technique matters as much as material choice. Rushing through air sealing defeats the purpose.
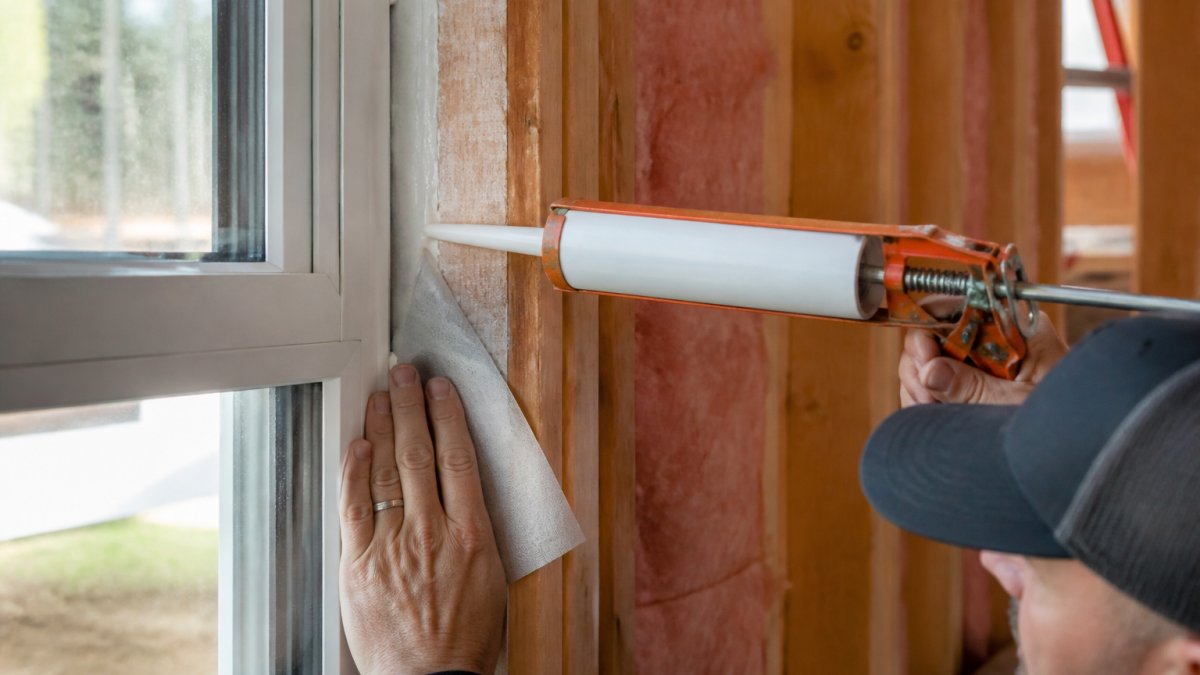
Sealing Joints, Seams, and Penetrations
Start with clean surfaces. Dust and debris prevent caulk and tape from bonding. Wipe surfaces with a damp cloth and let them dry.
Apply caulk in a continuous bead. Don't use short dabs, they create weak points. Fill the entire joint in one smooth motion. Use a caulking gun with steady pressure.
Smooth the caulk bead with a wet finger or caulk tool. This presses it into the joint and creates a weather-tight seal. Rough, unsmoothed caulk looks unprofessional and seals poorly.
For tape, apply it over joints with firm pressure. Overlap tape at corners and intersections. Tape bridges gaps better than caulk alone on rough surfaces.
Seal around pipes and electrical boxes with spray foam. Fill the gap completely. Let foam cure, then trim excess with a utility knife.
Caulk, Tape, Foam, and Membranes: When to Use Each
Use caulk on visible seams, joints, and around window and door frames. It accepts paint and looks finished. Apply it where appearance matters.
Use tape on hidden framing joints, rim joists, and rough surfaces. Tape sticks better to wood than caulk does. It covers larger areas faster. Use it where appearance doesn't matter.
Use spray foam around pipes, electrical penetrations, and irregular gaps. Foam fills voids quickly and adapts to odd shapes. It's overkill for straight joints but essential for complex penetrations.
Use membranes on exterior sheathing or large drywall areas. Brush or roll them on quickly. They create a continuous seal over large surfaces. Membranes work well for retrofit air sealing where access to joints is limited.
Combine materials for efficiency. Tape the framing, caulk the visible seams, foam the penetrations. This layered approach uses each material where it performs best.
How to Find Air Leaks in a Home During Construction
Finding leaks before drywall closes walls is critical. Once walls are sealed, finding leaks becomes expensive.
Perform a visual inspection as framing progresses. Look for gaps between framing members, around electrical boxes, and at rim joists. Mark these with tape or marker.
Use a smoke pencil or incense stick during construction. Light it and watch the smoke. It moves toward air leaks. This simple test reveals gaps you might miss visually, especially around complex penetrations.
Check for gaps around HVAC ducts, plumbing stacks, and electrical conduits. These penetrations often have large gaps because trades don't coordinate their work.
Inspect window and door openings. Gaps around rough openings are common. Seal them before installing windows and doors.
Document leaks with photos. This creates a record and ensures nothing gets missed during sealing.
Blower Door Test: Measuring Airtightness and Setting Targets
A blower door test measures how airtight your home actually is. It pressurizes the home and measures air leakage rate.
The test results are expressed as air changes per hour (ACH) or cubic feet per minute (CFM). Lower numbers mean tighter homes. A typical new home achieves 7-10 ACH. High-performance homes reach 3-5 ACH. Passive House certified homes achieve under 0.6 ACH.
Set a realistic target before construction starts. Decide what level of airtightness makes sense for your budget and climate. This target guides your air-sealing effort.
Test during construction if possible. Early testing reveals problem areas while they're still accessible. You can seal and retest to verify improvements.
The blower door test costs between $300-500 for a single test. Budget for at least one test at project completion. Many builders test twice: once during framing and once at final inspection.
Ventilation and Moisture Management: Avoiding Common Pitfalls
Here's where many projects go wrong: builders seal the home tight but forget about ventilation.
An airtight home needs controlled ventilation. Without it, moisture builds up and causes mold and rot.
Size the ventilation system correctly. Too small and it can't keep up with moisture. Too large and it wastes energy. Follow local building codes for minimum ventilation rates.
Run exhaust ducts to the outside, not into attics or crawl spaces. Moisture from bathrooms and kitchens must leave the home completely.
Insulate and seal all ductwork. Leaky ducts lose heat and allow moisture to enter walls.
Avoid the mistake of sealing the home so tightly that you create a moisture trap. Proper ventilation is just as important as air sealing. They work together to create a healthy, efficient home.
Building an airtight home on a budget requires planning, the right materials, and careful execution. Our real-time Client Project Portal lets you track every phase of your build, from air barrier planning through final blower door testing, so you stay informed every step of the way.
Frequently Asked Questions
How do you make a new home airtight on a budget?
Prioritize high-impact areas: seal the thermal envelope at the foundation, around windows and doors, and at roof penetrations first. Use cost-effective materials like caulk and air-sealing tape instead of spray foam where possible. Plan your air barrier strategy before construction begins so sealing is built into the schedule rather than added as an afterthought. Focus on careful workmanship and quality control during installation, attention to detail costs less than rework later.
Is it cheaper to air seal during construction or after?
Air sealing during new construction is significantly more cost-effective. During construction, workers can access all joints, seams, and penetrations easily, and sealing is integrated into the building process. Retrofitting an existing home requires opening walls, removing finishes, and working around obstacles, which drives up labor costs substantially. Budget-conscious builders always prioritize airtightness as part of the initial construction plan, not as a later upgrade.
What are the most important areas to air seal during construction?
Focus on the thermal envelope: the foundation-to-wall junction, all roof penetrations, and the air barrier line where walls meet the ceiling. Windows and doors account for significant air leakage, so seal around frames carefully. Service openings for plumbing, electrical, and HVAC are major leak sources. Joints and seams in exterior sheathing and at transitions between materials are critical.
Can a home be too airtight, and how should ventilation be handled?
A home can be too airtight without proper ventilation. As the building envelope tightens, moisture and indoor air quality become concerns. Modern airtight homes require controlled mechanical ventilation, such as an Energy Recovery Ventilator (ERV) or Heat Recovery Ventilator (HRV), to exchange stale indoor air for fresh outdoor air while retaining heat. Ventilation and moisture management must be planned alongside your air-sealing strategy to avoid condensation and indoor air quality problems. This is not optional in high-performance construction.