 listicle
7 Signs of Poor Roofing Installation on New Houses
Last Updated: October 22, 2026
Quick Summary
Poor roofing installation on new houses shows up as uneven or raised shingles, missing or curling shingles, exposed and overdriven nails, poor flashing and valley work, and leaks or water intrusion found first in the attic. Most defects trace back to sloppy workmanship, not bad materials, and the most expensive ones are invisible from the ground.
- Sight along the ridge and eaves from the driveway; a new roof should read as a clean, straight line.
- Check nailing patterns against the manufacturer's specification, not against habit.
- Ask your builder for photos of flashing and valley work taken before the shingles went on.
- Get into the attic within a day of steady rain and look for dark streaks, rusted nail points, and damp insulation.
- Document defects with dated photos and a four-column log, then notify the builder in writing.
Table of Contents
- Why New Roofs Fail: Understanding Poor Roofing Installation
- 1. Uneven, Misaligned, or Raised Shingles
- 4. Poor Flashing, Starter Shingles, and Valley Work
- 5. New Roof Installation Problems: Leaks and Water Intrusion
- Your Roof Inspection Checklist for New Homes
- How to Document Construction Defects and Protect Your New Home Roof Warranty
- Frequently Asked Questions
Why New Roofs Fail: Understanding Poor Roofing Installation
We are Timeless General Contracting, and we have spent 25 years building and renovating homes in Pictou County.
The core problem: a roof is a system, not a pile of shingles. Shingles, underlayment, flashing, starter strips, and ventilation must work together; when one piece is rushed, the others fail early. Most defects trace back to sloppy workmanship, not bad materials.
1. Uneven, Misaligned, or Raised Shingles
Uneven, misaligned, or raised shingles are the most visible sign of poor roofing installation on new houses.
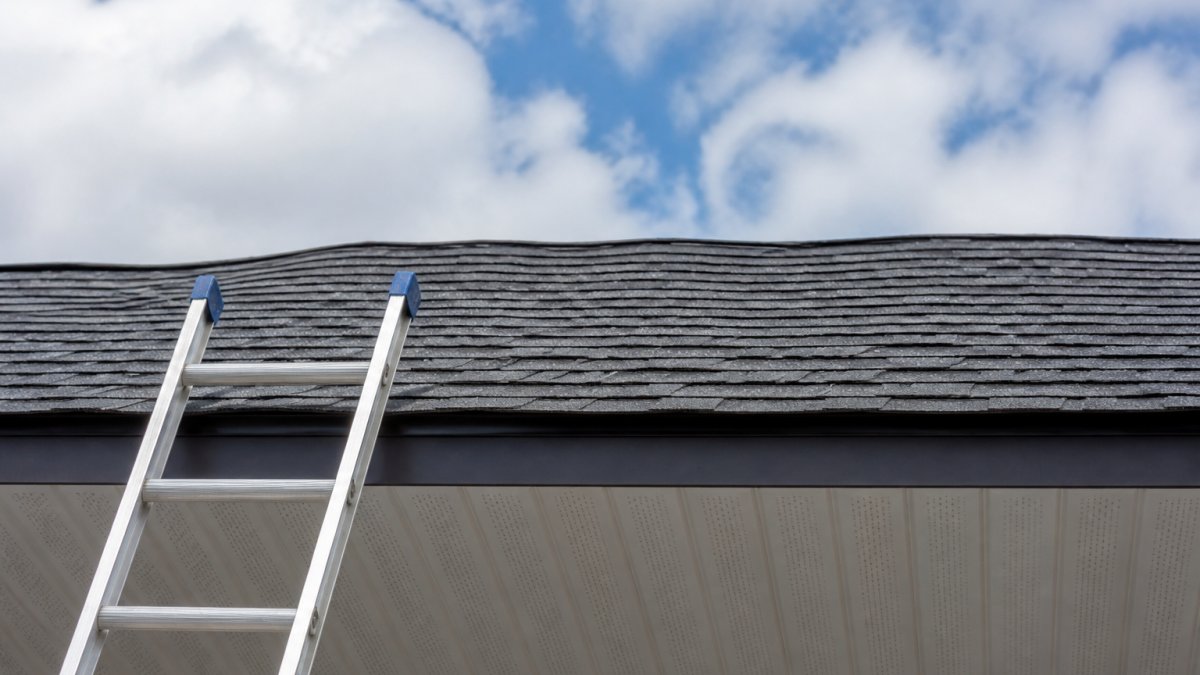
Stand at the end of the driveway and sight along the ridge and eaves.
(https://www.iko.com/na/blog/spotting-the-signs-of-an-improper-roof-installation/) is a useful starting point for homeowners who want a visual reference before calling anyone.4. Poor Flashing, Starter Shingles, and Valley Work
A missing or improperly installed starter course is one of the most common shortcuts on new construction: invisible from the ground, cheap to skip, and it makes the whole roof more vulnerable to wind uplift.
Roof valleys, where two slopes meet, carry the heaviest water flow. A sloppy valley is woven or cut incorrectly, and it will leak. Flashing around roof penetrations deserves the same scrutiny.
5. New Roof Installation Problems: Leaks and Water Intrusion
New roof installation problems show up as leaks and water intrusion long before visible damage, and on a new house the first evidence is almost always in the attic rather than on a ceiling.
A failed flashing detail lets water in at the penetration; it runs down the underside of the sheathing, follows a rafter to a joint, and drips onto the insulation or ceiling below.
What to look for in the attic after a heavy rain
Get into the attic within a day of steady rain, with a flashlight, and look for these specific conditions:
- Dark streaks or tide marks on the roof sheathing, especially near valleys, chimneys, and vent penetrations. Fresh water marks are darker than old ones and have a defined edge.
- Rusted or stained nail points poking through the sheathing. A nail that has rusted from the inside out is a reliable sign of repeated wetting, not a single event.
- Damp or compressed insulation directly below a suspect area. Wet insulation loses R-value and stays wet, which compounds the problem.
Ventilation is part of the installation, not an add-on
A roof can be installed perfectly and still fail if the ventilation is wrong. Poor attic ventilation traps moisture that condenses on the cold underside of the deck, rotting sheathing and rusting fasteners from the inside. On a new house, ventilation design is part of the roofing scope: intake at the soffits, exhaust at the ridge or high on the roof, and a clear air path between them.
If you suspect a leak, do not wait for the ceiling to stain. Get into the attic after a heavy rain and look for moisture, then photograph what you find with a date reference. Natural Resources Canada's guidance on moisture and ventilation in homes explains how trapped moisture damages a building envelope over time and why ventilation and air sealing have to be designed together.
Severity: cosmetic versus active water entry
Not every attic observation is an emergency, and ranking what you find keeps the conversation with your builder focused. A single rusted nail point with no staining is a monitor-and-report item. Active dripping, wet insulation, or a defined water mark on the sheathing is an active water-entry risk and should be reported in writing the same day. Condensation and frost without a water path point to a ventilation defect, still a roofing-scope issue on a new build, but a different repair path.
Your Roof Inspection Checklist for New Homes
A roof inspection checklist for new homes should be organised by roof component, not by what happens to be visible, the difference between a real inspection and a quick glance. Here is the checklist we would use on any new build:
| Component | What to Check | Red Flag |
|---|---|---|
| Shingle field | Straight courses, flat lay, sealed tabs | Wavy lines, raised or curling shingles |
| Nails | Correct placement, fully covered | Exposed or overdriven nails |
| Starter course | Present along eaves and rakes | Missing or short starter strip |
| Flashing | Sealed at walls, vents, chimneys | Gaps, loose metal, missing sealant |
| Valleys | Clean line, correct weave or cut | Debris, exposed fasteners, gaps |
| Edges and rake | Straight, secure, drip edge fitted | Loose drip edge, exposed deck |
| Attic | Dry sheathing, clear ventilation path | Damp deck, rusted nails, blocked vents |
A homeowner can safely check the ground-level items: the roofline, the eaves, the gutters, and the attic. Anything that requires walking the roof, especially on a new build with steep or fragile surfaces, belongs to a professional. Canadian Centre for Occupational Health and Safety guidance on working at heights is clear on why fall protection matters, and a homeowner inspection is not worth a fall.
How to Document Construction Defects and Protect Your New Home Roof Warranty
How to document construction defects comes down to three things: evidence, severity, and urgency, applied through the new-home process rather than as a one-off complaint. What protects you is the sequence: inspect, record, notify in writing, and follow the builder's own process before the workmanship window closes.
Step 1: Build the evidence file before you notify anyone
Start with dated photos from multiple angles, including the attic. Note the date, weather, and exactly what you observed, and keep every email and text with your builder.
Keep a simple log with four columns: date, location on the roof, what you observed, and severity. This log becomes the backbone of every conversation with the builder and, if it comes to it, with the warranty provider.
Step 2: Rank severity so the builder cannot reframe the issue
Rank each defect by severity before you report it: a single exposed nail is a quick fix, a leaking valley is urgent, and a raised shingle field that has not settled after several warm weeks is a workmanship question needing professional assessment. Put the severity in writing when you notify your builder, so there is no later argument about how serious the issue was or when you first raised it.
Step 3: Use the builder's process, and the punch list
On a new build, the punch list is the formal mechanism for defects identified before or at possession. Roof items belong on it, described specifically: 'raised and unsealed shingles along the south rake, approximately three metres from the southeast corner,' not 'roof looks wavy.' Specific descriptions are harder to dispute and easier to verify on re-inspection. Past the punch-list stage, submit defects through the builder's warranty service process in writing and keep the confirmation.
Step 4: Understand the two warranties you actually hold
Your new home roof warranty usually splits into two parts: materials coverage from the manufacturer and workmanship coverage from the builder. Workmanship coverage is the one that matters for installation defects, and it has a time limit. Read it before you need it and note the notice requirements, many workmanship warranties require written notice within a set period of discovering the defect, and some require the builder be given a chance to repair first.
In several provinces, new homes also carry statutory warranty protection setting minimum coverage periods for defects in work and materials, plus separate coverage for major structural defects. The exact periods, definitions, and dispute process vary by province and by enrollment with the provincial warranty provider. Check your province's new-home warranty framework and enrollment documents rather than relying on the builder's summary.
Step 5: Bring in an independent inspection if the response stalls
If your builder is slow to respond or disputes the defect, an independent inspection from a Red Seal certified contractor gives you a second, credible opinion.
An independent inspection from a Red Seal certified contractor can assess the roof, document what is found, and tell you plainly whether it is a real defect or normal settling, in writing, so it holds up in the warranty process.
Frequently Asked Questions
What are the first signs of a poorly installed roof on a new house?
The earliest signs usually show up along the roof edges and in the field of shingles: wavy or misaligned rows, exposed nail heads, curling corners, and flashing that sits loose around chimneys or vents. Check the roof line from the ground with binoculars before you take possession. A new roof should look flat and consistent, with straight horizontal lines. Any hump, dip, or shingle sitting proud of its neighbors is worth flagging to your builder in writing right away.
Can a poorly installed roof cause leaks even when the shingles look fine?
Yes. Many new roof installation problems start at the details you cannot see from the ground: missing starter shingles along the eaves, under-driven or over-driven nails, and valleys that were woven or cut incorrectly. Water can travel along the deck before it finds a gap. Watch for attic staining, damp insulation, or ceiling marks after heavy rain. If you spot any of these, ask for a professional roof inspection rather than waiting for the next storm season.
How do I document construction defects for my builder?
Photograph each issue from multiple angles, including a wide shot that shows where on the roof it sits. Note the date, weather, and location. Send everything by email so you have a written record, and ask the builder to confirm receipt and a repair timeline. Keep a simple log of every conversation. This paper trail matters if the issue escalates to a warranty claim or a formal dispute, and it makes it much harder for anyone to argue the defect was not reported.
Does a new home roof warranty cover workmanship defects?
It depends on the warranty. Manufacturer shingle warranties usually cover product failure, not how the roof was installed. Workmanship coverage typically comes from the builder or installer and runs for a set period, often shorter than the material warranty. Read your new home roof warranty carefully and confirm what is covered, for how long, and who honors the claim. Ask for the workmanship terms in writing before you sign, and keep the documents with your closing package.
Should I hire an independent inspector to check a new roof?
An independent inspection is worth the cost on a new build, especially before your warranty period ends. A certified inspector can spot flashing, nailing, and ventilation issues that are easy to miss from the ground. Schedule it after the roof is complete but before possession if possible, and again near the end of the workmanship warranty. Their written report gives you documented evidence you can hand to your builder if repairs are needed.